How to Find a Hidden Water Leak in Your Home
A hidden water leak does not always announce itself with a puddle. You might notice a higher water bill, a musty cabinet, or a ceiling stain that keeps returning.
The challenge is finding the source. Water can travel along pipes, framing, and flooring before it becomes visible, so the wet patch is not necessarily directly beneath the leak.
This guide explains how to check for unexplained water use, inspect common trouble spots, and narrow down the likely source before opening walls or floors.
Difficulty:
Moderate
Time:
30–60 min
Cost:
$0–$30
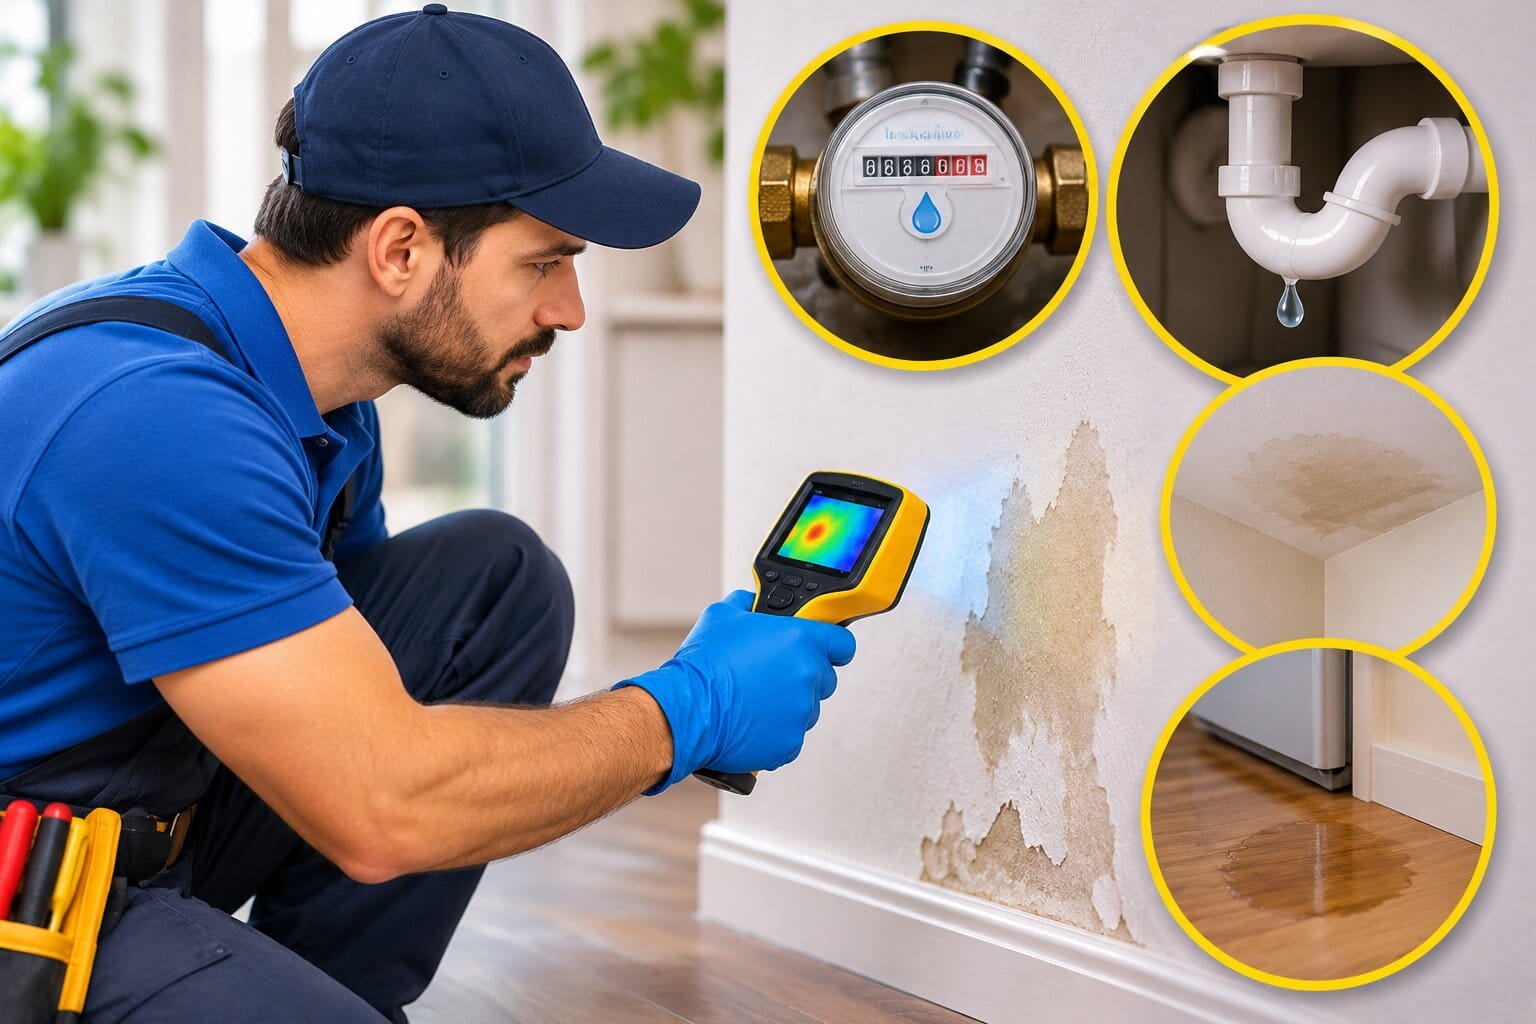
Before You Start: Check for Urgent Problems
Stop investigating and arrange urgent help if you notice:
- Water near electrical outlets, wiring, or a switchboard
- A sagging or bulging ceiling
- Rapidly spreading water damage
- A burst pipe or uncontrolled flow
- Wastewater or sewage entering the home
- An unstable or badly damaged floor
Stay away from a sagging ceiling. Do not puncture it or stand underneath it.
If water is reaching electrical equipment, do not touch the wet equipment or approach a panel through standing water. Have the situation assessed by appropriate professionals.
For an active plumbing leak, close the affected fixture’s supply valve or the home’s main shut-off if you can reach and operate it safely. Follow appliance instructions where shutting off water affects a water heater or other equipment.
Start Here: Look for the Main Clues
A single symptom does not confirm a pipe leak. Use several clues together.
- Water consumption rises without an obvious reason: Toilets, irrigation, appliances, and concealed supply pipes.
- Meter records use when everything should be off: A leak or an overlooked automatic water user.
- A stain worsens after a shower: Shower plumbing, drain, seals, or waterproofing.
- Dampness appears after rain: Roof, guttering, flashing, windows, or external drainage.
- A cabinet smells musty: Slow plumbing leak, trapped moisture, or condensation.
- A patch of flooring feels unusually warm: Nearby heating or hot-water pipework, including a possible leak.
- One garden area stays wet in dry weather: Irrigation, a buried service pipe, or another drainage source.

Tools and supplies
- Flashlight
- Phone or camera
- Dry paper towels
- Small bucket
- Notebook
- Food coloring or toilet leak-detection tablets
- Access to your water meter or utility usage portal
- Moisture meter, if available
Start with observation. You do not need to drill, cut, or lift flooring to establish whether there may be a leak.
If you rent or live in a building with shared plumbing, notify the landlord or building manager. A shared meter cannot isolate your individual use without additional information.
1. Review Your Water Consumption
Compare the current bill with previous readings, focusing on water volume, not just the amount charged.
Check for:
- A longer billing period
- An estimated reading followed by an actual reading
- More occupants or visitors
- Increased garden watering
- Pool filling or automatic top-up
- New appliances or changed routines
Use consistent units. Your bill may show gallons, cubic meters, or kiloliters.
If your provider offers daily or hourly usage, look for water use during periods when nobody normally needs it. Continuous overnight flow can be a useful clue, although automatic equipment must be ruled out first.
Water Corporation explains that smart-meter leak alerts use patterns of continuing water flow to identify a possible problem. An alert indicates something to investigate, rather than an exact leak location.

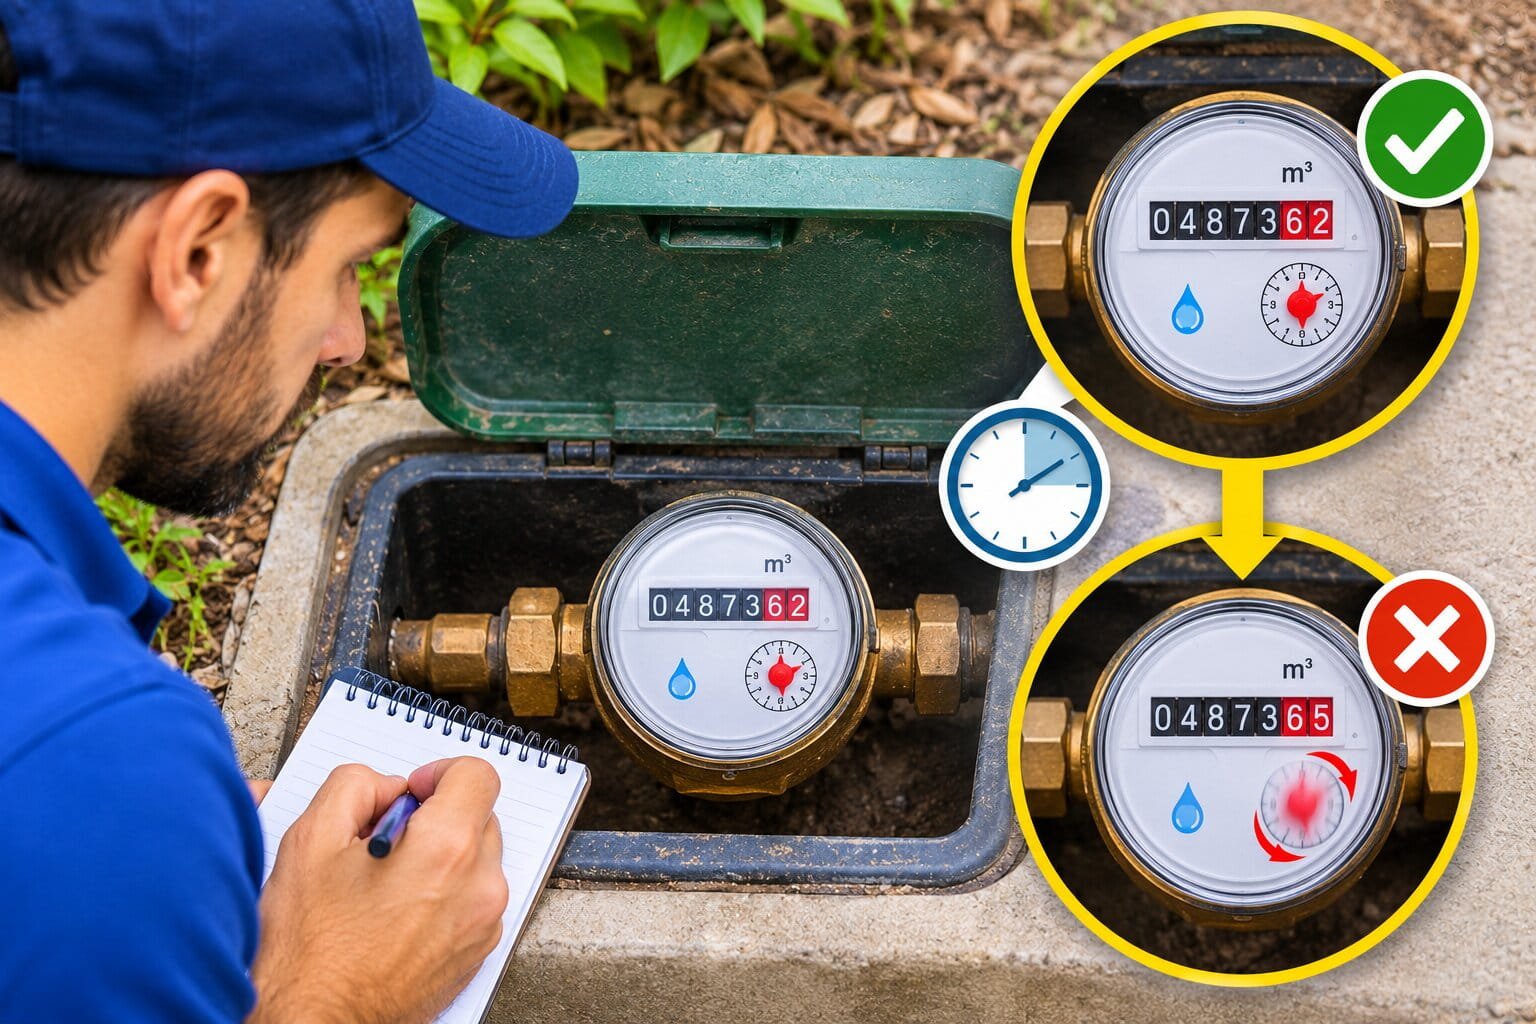
2. Perform a Water Meter Leak Test
A meter test helps identify water passing through the metered supply when you do not expect any use.
Choose a time when the household can avoid using water.
- Turn off faucets and showers.
- Allow toilets to finish refilling.
- Stop dishwashers and washing machines from running.
- Check that irrigation and automatic top-up systems are inactive.
- Account for equipment such as water softeners, ice makers, and evaporative coolers.
- Photograph or write down the meter reading.
- Avoid using water during the test.
- Compare the reading afterward.
The EPA recommends comparing readings before and after a two-hour period with no water use. Do not wait for a full test if there is already active damage that needs immediate attention.
If the reading increases, water has passed through the meter. That may be a leak, but confirm that an automatic appliance did not operate.
For a digital meter, follow your utility’s instructions for reading its flow display and refresh interval.
A stationary meter does not rule out every leak. Drain leaks, rainwater entry, and intermittent leaks may not show during the test.
3. Test Toilets for Silent Leaks
Check each accessible tank or cistern:
- Let it finish refilling.
- Add a few drops of food coloring or a suitable dye tablet.
- Wait 10 minutes without flushing.
- Look for color in the bowl.
- Flush afterward to clear the dye.
Color reaching the bowl indicates water leaking through from the tank. The EPA recommends this test for detecting toilet leaks.
Also listen for occasional refilling when nobody has used the toilet.
A positive result identifies a tank-to-bowl leak. It does not confirm whether the toilet’s floor connection or external fittings are sound.

4. Inspect Under Sinks and Around Fixtures
Empty cabinets so you can see the plumbing clearly.
Dry accessible surfaces, then inspect:
- Vacation or holiday mode
- A heating schedule that does not match your routine
- A recently changed setting
- A disabled booster
- A remote-control or app schedule
- A mode intended to reduce energy use
Use a dry paper towel against accessible connections to help reveal a small amount of fresh moisture.
Observe the area with the faucet off. If there is no active damage or electrical risk, run a small amount of water while watching the supply and drainage connections.
Moisture that appears only during draining points toward a different part of the system from a hose that drips continuously.
Water can also enter around a poorly sealed sink edge or faucet base.
For a visible connection leak, see our guide to fixing a leaking pipe under the sink.

5. Check Appliances and the Water Heater
Inspect accessible areas around:
- Washing-machine hoses
- Dishwasher connections
- Refrigerator water lines
- Water-filter housings
- Water softeners
- Water heaters and nearby fittings
Look for mineral trails, rust marks, damp flooring, and swollen cabinetry.
Do not pull a heavy appliance against attached hoses, reach behind energized wet equipment, or open service panels.
Around a water heater, moisture may come from a connection, condensate system, relief discharge, or the tank. Do not assume that every puddle means a leaking tank.
Never cap a safety-valve discharge pipe or disconnect pressurized equipment to investigate.
If an appliance leaks during use, stop operating it and arrange the appropriate repair.

6. Inspect Walls, Ceilings, and Floors
Look for changes rather than relying on one stain:
- Blistering paint
- Swollen trim or skirting boards
- Lifting flooring
- Repeated discoloration
- Soft or crumbling material
- Musty odors
- Visible dampness
Photograph affected areas and record the date. Note whether they change after rain, bathing, laundry, or other water use.
Do not assume the source is directly above the mark. Water may travel before it appears.
Avoid cutting into a damp wall or ceiling. Hidden wiring, pipes, and potentially hazardous building materials make exploratory demolition a poor first step.
For a roof or upper-story concern, arrange inspection rather than climbing onto the roof yourself.

7. Check Outdoors and Around Buried Services
Walk around the property during dry weather, where it is safe to do so.
Check for:
- Dripping outdoor taps
- Leaking irrigation fittings
- Wet valve boxes
- Unusually persistent damp patches
- Water running toward the street
- Moisture near the water meter
An unusually green patch of lawn may justify investigation, but shade, soil, and drainage can create similar patterns.
Do not dig along a suspected service pipe or operate utility-owned valves. Contact the water provider if you suspect its equipment or public pipework.
Responsibility boundaries differ by provider and property. Ask who owns the affected section before arranging excavation or repairs. Water Corporation, for example, distinguishes responsibilities for different meter and pipework locations.

8. Use Existing Isolation Valves to Narrow the Search
If unexplained meter use continues, accessible homeowner-operated isolation valves may help identify an affected branch.
For example, a toilet that has finished filling can be isolated temporarily and the no-use meter check repeated. A change in unexplained consumption helps direct the investigation.
Only do this when:
- You know which supply the valve controls.
- The valve moves normally and does not leak.
- Connected equipment can be safely left isolated.
- You follow any relevant operating instructions.
Do not force old valves or disturb water-heater, fire-sprinkler, or unfamiliar system controls.
Water Corporation notes that isolation valves can assist leak investigations. They help narrow the area; they do not pinpoint a break inside a wall or underground.
A plumber can perform more controlled isolation and pressure testing when needed.

9. Use Moisture-Detection Tools Carefully
Moisture Meters
A moisture meter can help compare a suspect area with nearby material that appears dry.
Follow the tool’s instructions and use the correct setting for the material. Readings can be affected by construction materials, metal, and other conditions.
A high reading indicates a reason to investigate. It does not identify the source or prove that a supply pipe is leaking.
Avoid pushing meter pins into areas that could contain wiring or services.
Thermal Cameras
A thermal camera shows surface-temperature differences. It does not see through walls or directly confirm water.
FLIR explains that thermal patterns can suggest moisture, but further checks are needed to verify the finding.
A warm floor patch or cool wall area may be useful evidence, but neither is enough on its own to justify opening the structure.

10. Arrange Professional Leak Detection
Call a qualified plumber or leak-detection specialist when the evidence points to a concealed plumbing problem.
Depending on the suspected source, they may use:
- Acoustic listening equipment
- Moisture mapping
- Thermal imaging
- Controlled isolation and pressure testing
- Drain-camera inspection
- Other specialist tracing methods
The tool should match the problem. A drain camera can inspect a waste pipe, but it does not locate every pressurized supply leak.
Give the technician your meter readings, photographs, and symptom timeline. Ask how the suspected location will be verified before opening walls, floors, or ground.
Could It Be Condensation or Rainwater Instead?
Cold pipes and toilet tanks can collect condensation in humid conditions. Roof defects, window leaks, and poor external drainage can also introduce water.
Useful clues include:
- After rain: Investigate the building exterior and rainwater paths.
- Only after a shower: Investigate plumbing, drainage, seals, and waterproofing.
- Continuous meter use: Investigate the metered supply and automatic water users.
- Moisture across cold surfaces: Consider condensation alongside other causes.
More than one problem can exist at the same time.
Common Mistakes to Avoid
- Judging by the bill total alone: Compare consumption and billing periods.
- Forgetting automatic water users: They can affect meter tests.
- Assuming a stationary meter rules out all leaks: Drain and rainwater leaks behave differently.
- Opening the wall at the stain: The source may be elsewhere.
- Treating thermal images as proof: Confirm findings with other evidence.
- Forcing isolation valves: Stop if they seize or leak.
- Covering damage before drying: Fix the source first.
What to Do After Finding the Leak
- Stop or isolate the source safely, then arrange the repair.
- Photograph the damage and retain repair records. Contact the landlord, insurer, or water provider where relevant; requirements and possible leak allowances vary.
- Dry affected materials promptly once the area is safe. The EPA recommends drying water-damaged areas and items within 24–48 hours to help prevent mold growth. Hidden cavities or extensive damage may require professional drying.
- Do not paint over a stain until the source is repaired and the material is adequately dry.
Frequently asked questions
Can I have a hidden leak without a higher water bill?
Yes. A small leak may be difficult to notice in billing data. Rainwater entry and some other moisture sources do not pass through your water meter.
Does a moving meter always mean a leak?
It means the meter is recording water flow. Rule out normal and automatic use before concluding that the flow is a leak.
How can I find a leak under a concrete floor?
Record the symptoms and confirm unexplained consumption where possible. Professional testing can narrow the location before flooring or concrete is disturbed.
Can a phone app detect water behind a wall?
An ordinary phone camera cannot reliably locate concealed water. Specialist accessories or sensors still need appropriate interpretation and verification.
Is a musty smell proof of a pipe leak?
No. It indicates a possible moisture problem, which could involve leakage, condensation, ventilation, or another source.
Should I leave the water off overnight?
For a confirmed active supply leak, isolation may limit further damage. Make sure you understand the effects on connected equipment and follow professional or manufacturer instructions.
Related Posts