How to Fix a Toilet That Won’t Flush Properly
A toilet that leaves paper behind, flushes weakly, or fills the bowl without clearing it needs a little investigation before you start replacing parts.
Sometimes the problem is inside the tank: a disconnected chain, low water level, or flush valve that does not open correctly. Other times, a partial blockage prevents water and waste from leaving the bowl.
This guide explains how to identify the difference, make common adjustments, and clear minor clogs without making the problem worse.
Difficulty:
Easy to Moderate
Time:
15–30 min
Cost:
$0–$20
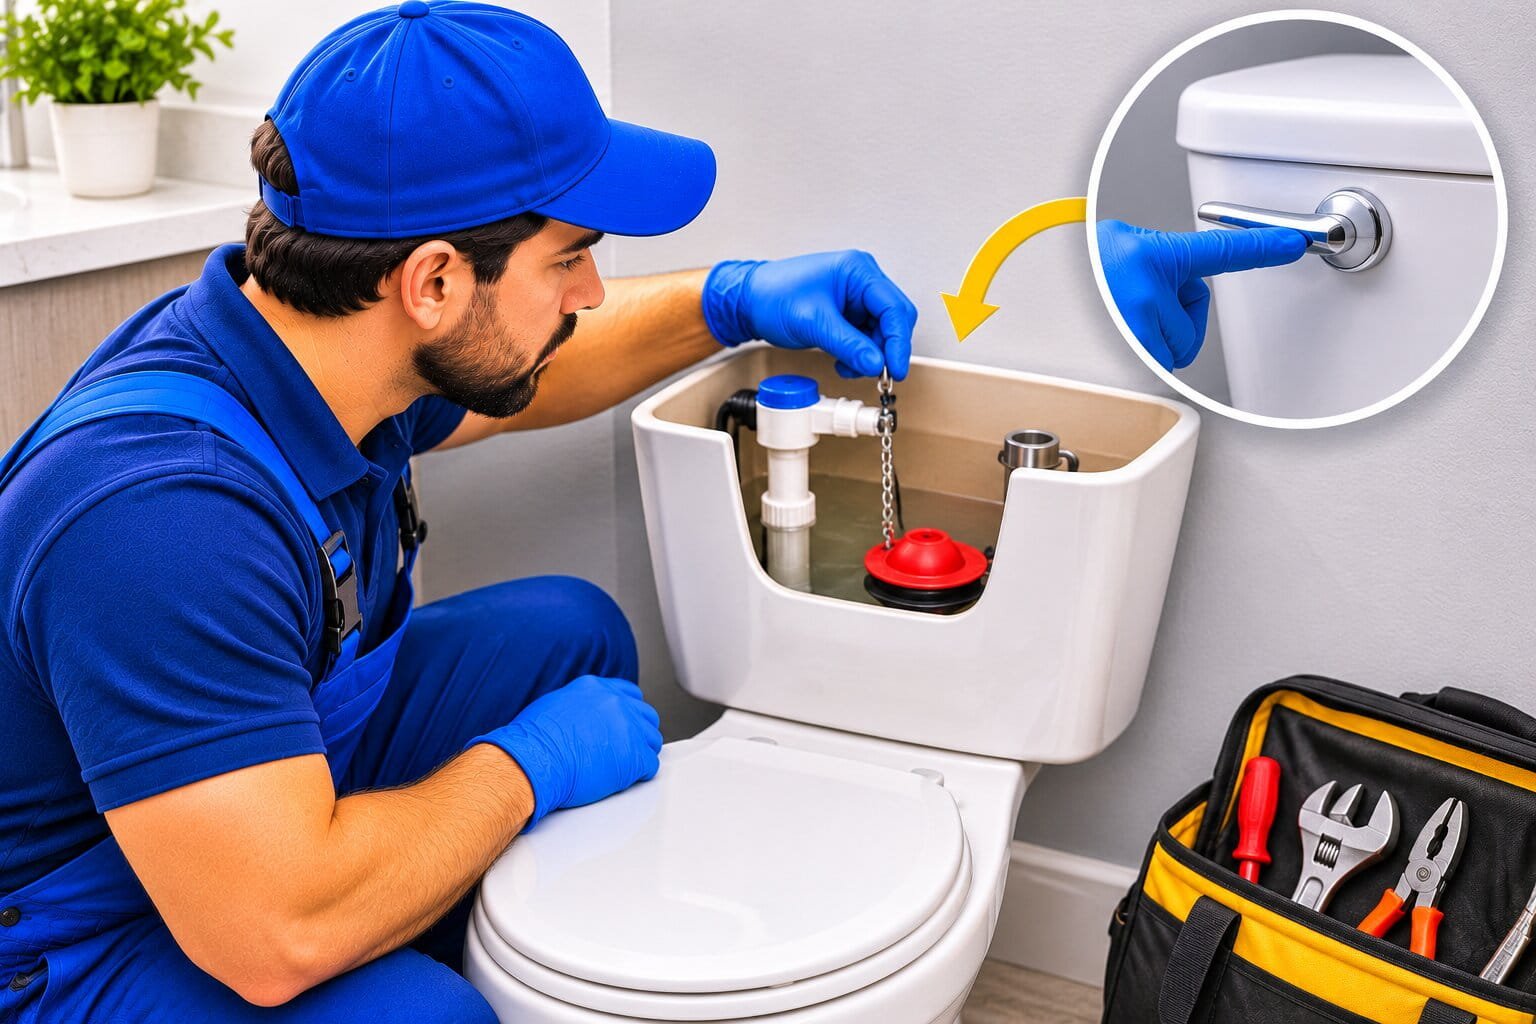
Before You Start: Prevent an Overflow
If the bowl water rises higher than normal, do not flush again. Another flush can send more water into a drain that is already struggling.
Locate the toilet’s shut-off valve, usually near the wall or floor behind the toilet. Close it gently if the toilet keeps adding water.
Turning off the supply stops refilling, but water already stored in the tank can still enter the bowl if you operate the flush.
Place towels around the work area and wait for the bowl level to fall before attempting to clear a blockage.
If wastewater backs up through a shower, floor drain, or another toilet, stop using the affected plumbing and contact a plumber
Start Here: Identify the Flush Problem
Watch what happens when you operate the handle or button—but only test-flush if the bowl is at its normal level and there is room for the incoming water.
- Handle moves, but nothing happens: Disconnected chain or broken lever.
- Button feels loose or does not activate a flush: Button linkage, rods, or cable.
- Tank contains very little water: Supply valve, fill valve, or float setting.
- Water enters the bowl weakly: Tank level, flush valve operation, or restricted outlets.
- Bowl rises and drains slowly: Partial blockage in the toilet or drain.
- You must hold the handle down: Chain adjustment, incompatible flapper, or flush valve operation.
- Toilet needs several flushes: Flush selection, insufficient water delivery, or a restriction.
- Nearby drains gurgle: A drainage or venting problem requiring investigation.
Tools and supplies
- Rubber gloves and eye protection
- Old towels
- Bucket or small container
- Flashlight
- Toilet brush
- Manufacturer-approved toilet cleaner
- Flange or beehive-style toilet plunger
- Toilet auger
- Screwdriver
- Compatible replacement parts, if needed
Find the toilet’s model number inside the tank, beneath the lid, or in its paperwork.
This guide focuses on gravity-fed toilets with accessible tanks, called cisterns in Australia. Pressure-assisted toilets, electronic toilets, and concealed cisterns have different service procedures.
Check local requirements before replacing plumbing components, and follow the manufacturer’s instructions.
1. Let the Tank Refill Completely
A second flush immediately after the first may be weak simply because the tank has not finished refilling.
Wait until the filling noise stops, then inspect the water level if the tank is accessible.
Lift the lid carefully and place it on a towel somewhere secure. Some push-button lids connect to rods or cables; check the removal instructions before lifting them.
If the tank does not refill:
- Check whether other cold-water fixtures work.
- Confirm that the toilet’s isolation valve has not been left partly closed.
- Look for a kinked supply hose.
- Check whether the float is stuck against another component.
Do not force a seized valve or pull on the supply hose.
On a conventional gravity toilet, low supply pressure usually affects refill speed more directly than flush force once the tank has filled to its correct level.

2. Check the Tank Water Level
A tank that stops filling below its intended level may release too little water for a proper flush.
Look for a marked waterline or consult the owner’s manual.
To correct an adjustable float setting:
- Identify the fill valve and its adjustment control.
- Check that the float moves freely.
- Follow the instructions to adjust the shut-off level.
- Allow the tank to fill.
- Confirm that water stops at the specified line.
Do not fill the tank above its intended level or let water continuously spill into the overflow.
There is no single measurement that suits every toilet. Kohler’s troubleshooting instructions specify matching the tank level to the model’s waterline when diagnosing a poor flush.
Remove improvised water-displacement objects if they interfere with the mechanism or reduce the usable flush volume below the toilet’s design.

3. Inspect the Handle and Chain
For a handle-operated toilet, watch the lever and chain as you move the handle.
The lever should lift the flush valve without catching on anything.
With the water shut off before making adjustments:
- Reconnect a detached chain to its proper attachment point.
- Untangle any twisted links.
- Adjust the chain according to the manufacturer’s instructions.
- Leave enough slack for the valve to close fully.
- Check that the handle returns freely.
Too much slack may prevent the flapper from lifting far enough. Too little can hold it open and cause running water.
If the lever is broken, replace it with a compatible part. Do not force its retaining nut: some toilet handle assemblies use a reverse-thread nut.
Restore the supply and test only when the bowl is draining normally.

4. Check the Flush Button or Dual-Flush Mechanism
For a push-button toilet, first confirm that you are using the correct flush option.
The reduced flush is generally intended for liquid waste. Use the full flush when required for solid waste and toilet paper, following the toilet’s instructions.
If the button does not activate the valve properly:
- Check that it returns freely after pressing.
- Inspect accessible rods, cables, or linkages.
- Look for a disconnected fitting or damaged part.
- Check adjustments against the model’s instructions.
- Refit the lid without trapping or preloading the mechanism.
Do not lengthen rods or change flush-volume settings by guesswork. An incorrect adjustment can prevent a full opening or stop the outlet valve from sealing.
For a concealed cistern, use the manufacturer’s approved access route. Do not pry off a flush plate or pull attached cables without instructions.

5. Check the Flapper or Flush Valve Operation
Once the tank level and controls are correct, observe how the outlet valve opens during a flush.
A replacement flapper that does not match the toilet—or is incorrectly adjusted—may close before delivering the intended flush.
However, the tank does not necessarily need to empty completely. Kohler notes that some toilets normally use only part of the stored water during each flush.
Check for:
- A flapper catching on the chain
- Incorrect replacement parts
- A canister or tower that binds
- Debris around a serviceable valve
- A seal that leaks between flushes
If replacing a part, match the toilet model and follow any required flush-volume settings.
A valve that leaks into the bowl between uses can also leave the tank short of water when the next flush begins. Repair that leak rather than compensating by raising the water level.

6. Clear a Partial Blockage With a Toilet Plunger
If water enters the bowl normally but rises and drains slowly, investigate a blockage.
Use a toilet plunger with a flange or a suitable beehive head. A flat sink plunger may not seal properly around the toilet outlet.
- Wait until the bowl level leaves enough room for plunging.
- If necessary, remove some water into a suitable container.
- Keep enough water to cover the plunger head.
- Lower it at an angle to let trapped air escape.
- Position it over the outlet.
- Make a gentle first push.
- Use several controlled push-and-pull strokes while maintaining the seal.
- Lift it and watch the water level.
Repeat briefly if the water begins draining.
Korky recommends a toilet-specific plunger and notes that water which still drains slowly may indicate a remaining partial blockage.
Do not plunge if chemical drain cleaner has been added. Tell the plumber what product is present.

7. Use a Toilet Auger for a Stubborn Clog
If plunging does not clear the problem, a toilet auger may reach an obstruction inside the toilet’s trapway.
Use an auger designed for toilets, with a protective guide to reduce the risk of scratching the bowl. RIDGID’s toilet augers incorporate a protective guard for this purpose.
Follow the tool’s instructions:
- Retract the cable into its guide.
- Position the protected end in the bowl outlet.
- Feed and rotate the cable gradually as directed.
- Use light pressure rather than forcing it.
- Withdraw the cable carefully.
- Remove any retrieved material and clean the tool.
Stop if the cable binds or will not advance.
If you know a toy or another solid object was flushed, professional retrieval may be better than pushing it deeper. Removing the toilet may be necessary.

8. Clean Restricted Rim Openings
If the bowl drains freely but water enters unevenly or the rim wash has weakened gradually, inspect the accessible water outlets.
Some toilets have small holes beneath the rim; others use a different flushing design.
For routine cleaning:
- Wear gloves and eye protection.
- Use a mirror or flashlight to inspect accessible areas.
- Apply a cleaner approved for the toilet’s finish.
- Brush deposits gently.
- Follow the label’s contact time and rinsing instructions.
Obstructed rim holes can contribute to poor rim wash, according to Kohler.
Do not drill or enlarge openings, use sharp metal tools on the glaze, or pour chemicals into the tank unless the manufacturer specifically directs it.
Never mix bleach with acidic toilet cleaners, vinegar, or other cleaning products.

9. Check the Bowl Refill Arrangement
An unusually low bowl water level after flushing can affect performance on some toilet designs.
If the toilet has a refill tube, check that it is connected and positioned according to its instructions.
Do not push a conventional refill tube deep into the overflow. Use its intended clip or connection, keeping the required air gap.
A low bowl level can have causes beyond the refill tube, including drainage problems or a defect. If it repeatedly drops after the toilet has finished refilling, arrange an assessment.
Kohler includes refill-hose placement in its troubleshooting for low bowl water levels.

10. Test the Toilet After Each Repair
Restore the water supply slowly and let the tank finish filling.
If the bowl is at its normal level and appears to drain freely:
- Flush once without adding paper or waste.
- Watch the bowl level.
- Confirm that water clears normally.
- Let the tank refill fully.
- Check the supply connection, tank, and floor for moisture.
For a dual-flush toilet, check that both controls operate and return normally.
Stop if the bowl rises toward the rim. Do not add more water to test an unresolved blockage.

Common Mistakes to Avoid
- Repeatedly flushing a rising bowl: This increases the overflow risk.
- Assuming every weak flush is a clog: Check the tank and controls too.
- Using the wrong plunger: A toilet needs a suitable seal.
- Fitting an incompatible flapper: Match the toilet’s specifications.
- Raising water above the marked line: Restore the designed level.
- Using ordinary drain cleaner: Many products are unsuitable for toilets.
- Forcing tools or fittings: Stop when a part binds or resists normal movement.
How to Prevent Future Flush Problems
- Only flush human waste and appropriate amounts of toilet paper.
- Keep wipes, paper towels, cotton pads, sanitary products, and other rubbish out of the bowl. Water Corporation recommends flushing only the three Ps: pee, poo, and toilet paper.
- Clean the bowl regularly with approved products, and investigate changes in refill time or flush performance before they worsen.
- Use compatible replacement parts and avoid tank additives prohibited by the component manufacturer.
Frequently asked questions
Why does my toilet flush but leave paper behind?
Possible causes include a reduced flush selected for the wrong load, low tank water, incomplete valve opening, restricted water outlets, or a partial blockage.
Why do I have to hold the handle down?
The chain or replacement flapper may be incorrectly adjusted, or the outlet mechanism may not operate as designed. Check the model’s instructions before changing parts.
Why does the bowl fill up and then drain slowly?
A partial obstruction is a common possibility. If other fixtures also gurgle or back up, the problem may be farther along the drainage system.
Can low water pressure cause a weak flush?
In a conventional gravity-fed toilet, low pressure generally slows tank refilling. Once the tank reaches its correct level, the flush mainly depends on the toilet’s stored-water and drainage design. Other toilet types can behave differently.
Should I pour boiling water into the toilet?
No. Avoid boiling water because the sudden temperature change can damage ceramic and create a burn hazard. Use appropriate mechanical methods instead.
Why does the toilet keep clogging?
A recurring obstruction, an object in the trapway, incorrect flush operation, or a drain problem may be responsible. Repeated plunging without a lasting improvement calls for investigation.
Related Posts